|
| BRITISH CHURCHILLS TACKLE GERMAN TIGER AND PANZER III TANKS |
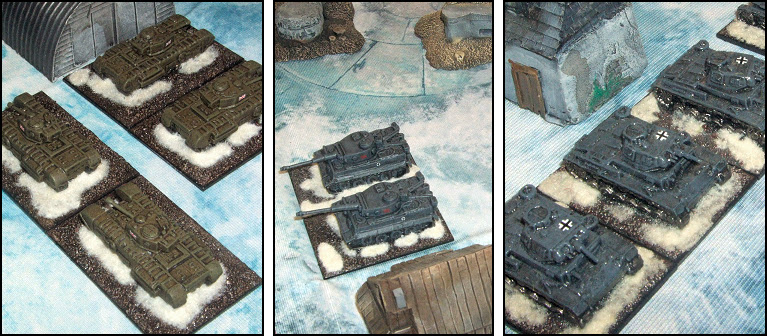
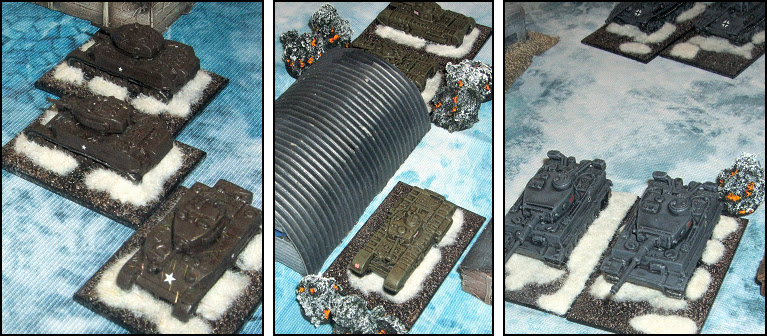
This game was played using some homemade rules (M.I.S.S.) so as to allow us to quickly play through a short campaign utilising many of my painted 10mm World War Two (Winter) models by "Pendraken Miniatures", and took place upon a 36" x 28" "Deep Cut Studio" playmat. The battlefield was populated with a variety of pre-painted "Escenografia Epsilon" scenic pieces previously sold through the Middlesbrough-based company at Warfare 2021, but now sadly out of production.
“The story so far… It is December 1944 and the German Army have now committed some of their heavier armoured vehicles to the Ardennes Offensive. Having originally penetrated the western front line from Losheim in Eastern Belgium, the Third Reich's spearhead now plans to envelope the Allied Forces stationed within the municipality of St. Vith by suddenly sweeping south. However, the Allies have no less than two squadrons of American M4 Shermans, two squadrons of British Churchill VIIs, and a small number of M5A Stuarts stationed there..."
 |
| BRITISH CHURCHILLS TACKLE GERMAN TIGER AND PANZER III TANKS |
The Germans started in the Fort District, with a division of Panzer III tanks and another of Panzer IV (75mm Short) tanks located along the region's southernmost area looking to quickly rush into the Rural and Fishing Districts. The Army's Tiger tanks were placed in the southeastern corner with orders to dominate the centre of the battlefield. Whilst a division of Panzer IV (75mm Long) tanks were positioned on the eastern flank so as to head straight into the Town District. A small unit of Panthers was held in reserve to support either the Tigers or Panzer IV (Long) tanks.
Across from the German's position, in the Village District, the First British squadron of Churchill VIIs were instructed to compete for the middle of the warzone, and Second British squadron, along with the American M5A Stuart tanks, tasked with taking the Fishing District. Both American squadrons of Shermans, codenamed "Babs" and "Vagabond", were ordered to travel north to 'capture' the Farm and Town Districts.
The tabletop was split into six identically-sized Districts, each populated with a number of buildings to represent their occupants. Each area was worth a single victory point, with a seventh point being offered to any unit which held the very centre of the battlefield. To win an area an army must be the only side with any armoured vehicles in it by the end of the game's sixth turn. Furthermore, no enemy tanks were allowed to come within an inch of an opponent's armoured vehicle. This was to ensure we played a 'shooting game' as opposed to just having all the tanks pile into one another.
 |
| THE BATTLE BEGINS WITH THE CHURCHILL TANKS TAKING A HARD POUNDING |
The battle opened with the Allies reacting to the presence of the Germans. Both the Second Churchill and Stuart squadrons moved west into the Fishing District. However, alarmed at the presence of the Tiger tanks, all of the Shermans headed northeast trying to ensure there were some buildings between them and their opponents. The First Churchill squadron remained stationary, and, having passed an intimidation check to fire at the Tiger tanks, managed to cause some minor damage to one of their "overengineered" opponents. First blood to the British.
In response, the Panzer III tanks headed south into the Rural District and the Panzer IV (Long) tanks moved southeast to swoop upon the Shermans. The Panthers also trundled south to support the Tiger tanks, which unsurprisingly returned fire upon the First Churchill Squadron hitting one armoured vehicle twice. Furthermore, the Panzer IV (Short) opened up upon the Second Churchill Squadron and struck one of its tanks a couple of times too.
Seizing the initiative, the Germans settled down to blast away at any and all opposition. Utilising their long-range guns, the Panthers struck the leading vehicle of the Second Churchill squadron. The Panzer IV (Short) tanks targeted the smoking hull and blew the British infantry tank up despite its heavy armour. Encouraged by their colleagues' success, the Panzer III tanks fired at the remaining Churchill tank hunkered down beside a Fishing factory, and caused two hits. Perhaps the Allies' reliance upon the armoured vehicles' 152 mm armour to keep them safe was unwise..?
 |
| THE CHURCHILL TANKS ENDURE AN ABSOLUTE DRUBBING AS THE 'HANDS' OF THE GERMAN TANKS |
The Tiger tanks subsequently poured more fire into the First Churchill squadron and two more fiery plumes erupted from their target. The British were definitely taking a hard-pounding in the early stages of this fight. To make matters worse, "Vagabond" squadron also lost one of its Shermans to a blaze of fire from the Panzer IV (Long) tanks.
Despite this loss though, the American Shermans continued heading north towards the Town District. Whilst the Stuarts swung into the Fishing District unchallenged. Showing plenty of Tommy steel, both British Churchill squadrons decided to stand their ground and returned fire upon their numerous attackers. A single Panzer III tank was 'cooked' by the assault. But the Tiger tanks were undamaged.
With the battle already very much in the balance, the Allies realised they needed to hold firm and poured as many shots into the oncoming Germans as they could muster. The Shermans' managed to get two crippling hits upon one of the Panzer IV (Long) tanks challenging them, and the First Churchill squadron managed a similar feat upon one of the Tiger tanks. However, the Second Churchill squadron missed the Panzer III tanks entirely. Perhaps discretion might have been the better part of valour..?
 |
| THE ALLIES FINALLY START TO PUT PRESSURE ON THE ADVANCING GERMAN LINE |
The Panthers continued to travel south in support of the Tiger tanks, who shockingly failed to hit any of their large British targets. The Panzer IV (Long) tanks did though manage to destroy another of the Shermans, and the first of the American Stuarts was pulverised by a salvo from the Panzer IV (Short) tanks. Quite possibly summing up the incredible good fortune of the Third Reich, one of the Panzer III tanks even managed to damage the sole-surviving member of the Second Churchill squadron.
Sensing that the moment to win this winter-based confrontation was now, the German Panthers rolled past the Tiger tanks with fresh orders to seize the centre of the battlefield. The Panzer IV (Short) tanks opened up upon the Stuarts, destroying another. However, luckily for the Allies, the American squadron's final armoured vehicle was just out of range of their guns. Such news did not cheer the "Grand Alliance" up for long though, as the Tiger tanks finally ripped apart one of the First Churchill squadron's members. Whilst the Panzer III tanks sensationally put an end to the entirety of the Second British Churchill Squadron. Plus, the Panzer IV (Long) tanks took out another of the Shermans.
 |
| ISOLATED AND ALONE. THE ALLIED TANKS TAKE SHELTER WHERE THEY CAN |
It was now clear that the combined British and American forces were never going to destroy enough of their opponent's vehicles in time to win any more districts, so the decision was made for the Allied tanks to hold what they already owned. Resultantly, the sole Stuart surrounded itself with Fishing warehouses, and the Churchill started to retreat back to the shelter of the Village District. The Shermans though needed to clear the Farm District of the Axis, so fired for all their worth at the Panzer IV (Long) tanks, and shockingly blew a pair of them up. Surely the Allies couldn't snatch an unlikely victory from the jaws of defeat..?
Racing north towards the Town District, "Vagabond" was ordered to ignore the remaining Panzer IV (Long) tank and 'go for the victory points'. "Babs" was instructed to provide the American Sherman squadron with covering fire, and incredibly blew away the final German tank in the Farm District - suddenly edging the Allies ahead. In a show of defiance, the Churchill blazed away at the approaching Panthers. But failed to make a connection.
Reeling from their grip of the battle astonishingly loosening, despite their superior firepower and numbers. The Germans attempted to seize as much territory as they could by moving the Panzer III tanks back to hold the Fort District. The Panzer IV (Short) were ordered south and the Panthers south-east. The Tiger tanks also repositioned themselves instead of firing, by wheeling about so they could strike east before the fight ended.
 |
| THE GERMAN HEAVY ARMOUR MOVE INTO POSITION TO SEIZE VARIOUS DISTRICTS |
"Vagabond" continued to travel north to take the Town District. Whilst "Babs" hunkered down to hold the Farm District. Content that they already had possession of the Village District, the Churchill once again fired at the Panthers, and once again missed their target.
The Panzer III tanks took the Fort District for the Axis forces, and the Panzer IV (Short) tanks captured the Rural District. Despite the fire from the First British Churchill squadron, the Panthers easily trundled into position at the centre of the battlefield. Finally, the Tiger tanks entered the Town District, contesting the area with the Shermans of "Vagabond" squadron. The battle was drawn, albeit the Allies had been pushed to their very limits...