Showing posts with label BATTLE REPORT. Show all posts

Saturday, 24 August 2024

"Marvel United" Battle Report: Black Widow, Hulk & Daredevil Verses The Red Skull - Part Two

THE RED SKULL IS HALFWAY TO CONQUERING NEW YORK CITY

This game is the second in a series of planned games designed to encourage me to paint up a significant number of the numerous hard-plastic miniatures available for "Marvel United" by "CoolMiniOrNot", and to help re-familiarize us with the core rules. It was played using some of the figures from both the original starter set as well as the Season One Promo Box, and took place upon the 90cm diameter double-sided playmat - which was exclusively released as part of the game's "X-Men" Kickstarter in April 2021.

“The story so far… The diabolical Red Skull is once again threatening the habitants of New York City with an army of Hydra henchmen. Determined to thwart the Nazi maniac's plot, the Black Widow, Daredevil and the Hulk have already put both Bob - Agent of Hydra, and Madame Hydra out for the count. But they still face a seemingly limitless number of Johann Shmidt's goose-stepping goons..."
THE TABLETOP - NEW YORK CITY

"Marvel United" Battle Report: Black Widow, Hulk & Daredevil Verses The Red Skull - Part One

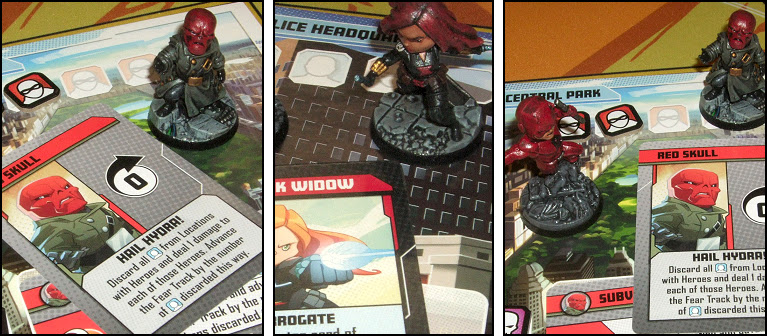
With a truly evil cackle the Red Skull moved to Central Park and using his "BLAM!" ability activated his "Subversion" threat card at the location. Shockingly, this raised the Fear Track up to a whopping 16 points, and brought the super-villain within moments of victory.

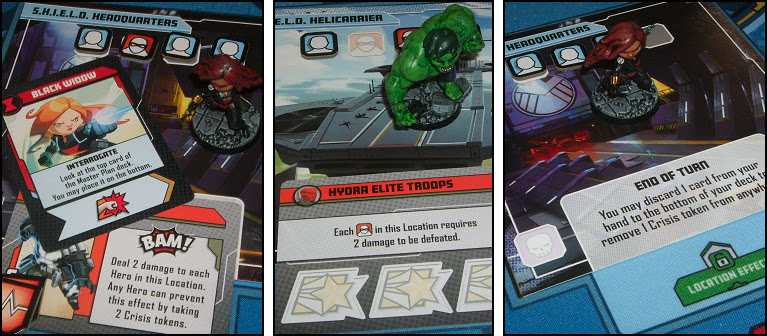
In response Daredevil played "Blind Justice", moved to New York Police Headquarters and beat up enough Thugs there to complete the Defeat Thugs mission. This meant that Shmidt was now finally vulnerable to being attacked by the heroes. Encouraged by this turn of events, the Man without Fear made his way to Time's Square and floored (yet) another Thug. In addition, the Hulk momentarily leapt onto the S.H.I.E.L.D. Helicarrier, smacked a Thug there, and then travelled to Stark Labs.

DAREDEVIL FINALLY MAKES THE RED SKULL VULNERABLE TO ATTACK

'Sitting pretty' at Central Park, Captain America's arch-nemesis gave an enthusiastic "Hail Hydra!" to cause the Hulk to suffer one damage and cause the Fear Track to rise to 17 points. Things definitely didn't look too good for the Avengers now, unless they took the fight directly to "the son of a coarse, drunken German villager."

Utilising "Interrogate" to determine that the Red Skull was going to remain at Central Park even longer, the Black Widow moved to New York Police Headquarters, took out a Thug there, and then had the local law enforcement detain another Thug in Time's Square. With Shmidt's forces dwindling fast, Daredevil swung into Central Park to face the fascist fiend, and socked him on the jaw for two damage - leaving Johann on six health.

THE RED SKULL LAUNCHES A DEADLY ASSAULT FROM CENTRAL PARK

Incensed by the blow, Hitler's one-time bellboy gave another "Hail Hydra!" However, due to Natasha Romanova knowing that this threat was coming, it had no effect. Instead, the red-faced bounder watched open-mouthed as the former Soviet spy raced to his location and triumphantly smacked him in the face.

Disappointingly though, the Hulk was unable to join his comrades-in-arms, and simply bided his time at Starks Labs. Quite possibly an opportunity to save New York City from Hydra's clutches once and for all had been lost..?

Realising that his position at Central Park was now untenable, the Red Skull fled to Avengers Tower and surrounded himself with hostages. It was clear that the "perfect Nazi" was a long way from giving up his dream of conquest.
THE BLACK WIDOW ARRIVES TO SMACK THE RED SKULL IN THE FACE

Spotting a few endangered Civilians on the S.H.I.E.L.D. Helicarrier, Matt Murdock's alter-ego swung by the airborne aircraft carrier to rescue them, before following his foe to Avengers Tower. There he witnessed the Hulk arrive and finally land some bone-crunching blows upon Shmidt. Hydra's leader was now down to just four health points.

Sensing defeat, the Red Skull escaped to New York City Police Headquarters and raised a bodyguard of yellow and green-garbed Hydra troopers to protect him.

He was quickly followed by the Black Widow, who once again was able to use "Interrogate" to determine what the German mastermind was planning, and punch him down to only three health points. Meanwhile, Daredevil made his way to Avengers Tower and detained a Thug lurking there.

THE BLACK WIDOW AND RED SKULL FACE-OFF IN A FINAL SHOWDOWN

In a 'do or die' moment, the "second most powerful man in the Third Reich" returned to the S.H.I.E.L.D. Helicarrier and surrounded himself with terrified Civilians. The Avengers had to take him out now or the super-villain would win.

Sadly, the incredible Hulk had to remain where he was at Avengers Tower, and resultantly was unable to get his super-strong hands on his foe. It therefore rested upon the Black Widow, who bravely arrived upon the S.H.I.E.L.D. Helicarrier. Natasha was able to rescue a Civilian, completing the Rescue Civilians mission, and give Shmidt a taste of her Widow's Sting. But the Johann still had one health point remaining and the Fear Track was about to tick to twenty.

DAREDEVIL AND THE HULK DESPERATELY ATTEMPT TO STOP THE RED SKULL

With a truly horrendous laugh, the Red Skull kicked the Black Widow off of the edge of the S.H.I.E.L.D. Helicarrier and plummet to her doom. Hydra had won the day, and New York City (for now at least) was in the control of the paramilitary terrorist organization...

Friday, 9 August 2024

"Marvel United" Battle Report: Black Widow, Hulk & Daredevil Verses The Red Skull

THE RED SKULL RETURNS TO ONCE AGAIN TAKEOVER NEW YORK CITY
This game is the second in a series of planned games designed to encourage me to paint up a significant number of the numerous hard-plastic miniatures available for "Marvel United" by "CoolMiniOrNot", and to help re-familiarize us with the core rules. It was played using some of the figures from both the original starter set as well as the Season One Promo Box, and took place upon the 90cm diameter double-sided playmat - which was exclusively released as part of the game's "X-Men" Kickstarter in April 2021.

“The story so far… Aided by his evil Hydra henchmen, the diabolical Red Skull has returned to threaten the entirety of New York City. Forewarned of the Nazi maniac's plot, the Black Widow and Daredevil have cut their patrol of Hell's Kitchen short, and teamed up with the incredible Hulk to stop the goose-stepping bounder once and for all."

THE TABLETOP - NEW YORK CITY

Due to the game featuring three heroes, the Red Skull was awarded eight health tokens, and the following six locations were deployed: S.H.I.E.L.D. Helicarrier, Central Park, Stark Labs, Time's Square, Avengers Tower and New York Police Headquarters. All of these sites' marked slots were then appropriately filled with either Civilian or Thug tokens. The villain's threat cards were also randomly placed face up at the bottom of each location.

Hermann Shmidt's son initiated his attack from the S.H.I.E.L.D. Helicarrier, whilst the Black Widow, Daredevil and Hulk began by confronting Bob, Agent of Hydra at Stark Labs. The Red Skull immediately caused the Fear Track to move to two points by utilising his "BAM!" special ability, and watched with satisfaction as Bob caused both Natasha Romanova and Bruce Banner to receive Crisis Tokens.

In response, the Hulk simply smacked the Agent of Hydra straight in the nose for two damage, and then watched with satisfaction as Black Widow completely floored Bob, moved across to Avengers Tower and gave Madame Hydra a fat lip too.

POOR BOB, AGENT OF HYDRA IS (ONCE AGAIN) BATTERED SENSELESS BY THE AVENGERS

Realising that Natasha Romanova was going one-to-one with Ophelia Sarkissian, Daredevil used his "Radar Sense" to also arrive at Avengers Tower and knock the super-villainess down to three Health. He then swung on to New York Police Headquarters collecting a Punch and Heroic Action token en route.

Deciding to form a diabolical team-up of his own, the Red Skull moved to Avengers Tower and utilised his "BAM!" power once again. This raised the Fear Track up to four points and injured the Black Widow for one damage. In addition, it permitted Madame Hydra to add a second Crisis Token to Romanova. With a cry of exhortation Captain America's arch-nemesis also completely filled Avengers Tower, New York Police Headquarters and Stark Labs with Thugs. Suddenly things were not looking too good for the heroes.

Bruce Banner's alter-ego could see that a stand had to be made at Avengers Tower now or the battle would soon be lost, so leapt into the fray and walloped Madame Hydra for two damage. The Viper was now down to just one Health point, and soon unconscious, courtesy of Natasha smacking her and a nearby Thug to the floor. The former Russian super-spy then made her way to Stark Labs to see about ridding Tony's scientific facility of its criminal infestation.

 THE HULK JOINS THE BLACK WIDOW AGAINST THE RED SKULL AT AVENGERS TOWER

Clearly needing to try and clear as many Threats in as short a time as possible, Matt Murdock made his way to the S.H.I.E.L.D. Helicarrier, and there defeated the Red Skull's nefarious plot to Brainwash its occupants. He also managed to rid the flying "seaworthy ship" of a Thug.

Angry at the fall of Madame Hydra, and his plans to use the Helicarrier's crew for his own evil ends, Johann Shmidt confronted Daredevil and injured the guardian of Hell's Kitchen for one damage. The fuming former Nazi agent also managed to raise the Fear Track to seven points via an overflow too.

THE BLACK WIDOW AND DAREDEVIL TRY TO WHITTLE DOWN THE NUMBER OF THUGS

Using his "Hulk Smash" ability, the green-skinned founding Avenger smacked two Thugs and rescued a Civilian at Avengers Tower. He then bounded over to New York Police Headquarters, scattered all the civilians 'imprisoned' there by the paramilitary terrorists, and turned his attention to the Hydra Elite Troops who were milling about him.

Meanwhile, the Black Widow continued to try and clear out Stark Labs by defeating a pair of Thugs there. Whilst Daredevil worked on defeating a Thug and rescuing some Civilians at the S.H.I.E.L.D. Helicarrier, before using the vessel to move to Avengers Tower.

THE HULK DECIDES TO SQUARE-OFF AGAINST THE THREAT OF HYDRA'S ELITE TROOPS

Fearing that the Earth's Mightiest Heroes might be getting the upper hand on him, the Red Skull flooded New York Police Headquarters with (more) Thugs, and raised the Fear Track to nine points. The fascist fiend was almost half-way to achieving his goal.

Surrounded by Hydra Elite Troops, the Hulk used three Heroic Actions to rid New York Police Headquarters of their threat, and resultantly put pressure on Shmidt - meaning the super-villain would now add "a Master Plan card to the Storyline after every two Hero cards."

This meant it was more crucial than ever that the Avengers cleared New York of enough of Thugs (and/or rescued enough Civilians) to enable them to directly attack the Red Skull. With this in mind the Black Widow battered another of goose-stepping swine's goons at Stark Labs, before smacking another at Avengers Tower. The fight was definitely on a knife's edge...

To be continued...

Wednesday, 10 July 2024

"Marvel United" Battle Report: Black Widow & Hulk Verses The Red Skull

THE RED SKULL ATTEMPTS TO TAKEOVER NEW YORK CITY

This game is the first in a series of planned games designed to encourage me to paint up a significant number of the numerous hard-plastic miniatures available for "Marvel United" by "CoolMiniOrNot", and to help refamiliarize us with the core rules. It was played using some of the figures from the original starter set, and took place upon the 90cm diameter double-sided playmat - which was exclusively released as part of the game's "X-Men" Kickstarter in April 2021.

“The story so far… The dastardly Red Skull is leading a deadly attack upon S.H.I.E.L.D. (Supreme Headquarters, International Espionage and Law-Enforcement Division) in New York City with the help of his Hydra hordes. Alerted to the mad Nazi super-villain's evil machinations, the Avengers have dispatched both the Black Widow and incredible Hulk to take the maniac and his minions down."

THE TABLETOP - NEW YORK CITY
Due to featuring just two heroes, the Red Skull was awarded four health tokens, and the following six locations were deployed: S.H.I.E.L.D. Headquarters, Central Park, Avengers Mansion, Stark Labs, S.H.I.E.L.D. Helicarrier and Avengers Tower. All of these sites' marked slots where then appropriately filled with either Civilian or Thug tokens. The villain's threat cards were also randomly placed face up at the bottom of each location.

Johann Shmidt's nefarious alter-ego started his assault at Stark Labs, whilst both the Black Widow and Hulk began at S.H.I.E.L.D. Headquarters - facing off against the Red Skull's personal bodyguard, Crossbones. In his first move, the "confidant of Adolf Hitler" moved to Avengers Mansion and triggered "Subversion", which caused one Civilian at that location to be removed and the Fear Track to advance to one. However, having added some more Thugs and Civilians to the adjoining locations, the Fear Track ended up at four (of twenty).

In response, the Hulk moved over to Central Park and immediately started clobbering poor Bob, Agent of Hydra. The Black Widow followed this up by joining the Green Goliath and making short work of the colourfully-costumed goon. This cleared the public open space of Hydra's malign influence, and allowed a Civilian there to relocate to S.H.I.E.L.D. Headquarters, and a Thug go to Avengers Tower.

POOR BOB, AGENT OF HYDRA IS CLOBBERED STRAIGHT OUT OF CENTRAL PARK

With one of the Red Skull's three minions already 'out for the count', the Hulk performed a "Smash" to leap over to Avengers Mansion where the super-villain himself was waiting. The impact of the founding Avenger's landing caused both Thugs there to be KO'd, the Civilian to scatter and even Shmidt to take a wound.

Incensed at the arrogance of his savage foe, the Red Skull remained where he was and whacked the muscle-bound Hulk in retaliation, costing the brute a card in damage. With the Fear Track subsequently advancing to six points, Natasha Romanova decided the Avengers should stick together as best as they could, so joined Hulk at Avengers Mansion, and then used two Heroic actions to almost best the "Subversion" threat present there.

THE RED SKULL STANDS TOE-TO-TOE WITH THE INCREDIBLE HULK

Building upon this team-work, the Jade Giant also used a Heroic action to remove "Subversion", moved over to Stark Labs, and beat-up a pair of Thugs loitering there.

The momentum was clearly with the heroes at this stage, as the Black Widow followed up her recent success by visiting Central Park, stinging the two Thugs awaiting her, and simultaneously rescuing a Civilian there too. It certainly looked like the Avengers had things well in hand currently.

Realising he had to act quickly to stop the gamma monstrosity before him, the Red Skull gave a "Hail Hydra" and damaged the Hulk a second time (removing another card from the monster's hand). The Fear Track was also move up to seven, meaning the diabolical super-villain was already a third of the way to succeeding in his devilish plan.

THE RED SKULL'S "HAIL HYDRA" ALMOST BRINGS THE HULK TO HIS KNEES 

Badly wounded, the Hulk used as many wild cards and heroic acts as he could muster to eradicate the "Brainwashing" threat at Stark Labs, and then returned Avengers Mansion once again to use its location's effect - drawing his hand back to three cards (and resultantly regaining his health).

Natasha Romanova decided it was time to "Interrogate" the heavily-muscled minion Crossbones, so moved over to S.H.I.E.L.D. Headquarters to do so, and having learnt of Schmidt's imminent scheme, decided to allow the villain to continue his master plan. Brock Rumlow however suffered two damage at the Avenger's not-so-delicate hands.

Knowing what was coming next, Bruce Banner's alter-ego returned to Stark Labs, and knocked out the thug there, completely clearing the technologically advanced facility.

THE HULK COMPLETELY CLEARS OUT STARK LABS OF THUGS

Deciding he had done all the damage which he could at Avengers Mansion, the Red Skull joined Madame Hydra at Avengers Tower, and ordered a number of abducted civilians be brought to his location, S.H.I.E.L.D. Headquarters and the S.H.I.E.L.D. Helicarrier - raising the the threat level to eight.

In the meantime, the Black Widow continued to pummel Crossbones for more information, and again decided to let Shmidt continue with his machinations in the short term, now the Avengers knew precisely what they were. The Hulk decided to tackle the formidable Hydra Elite Troops aboard the S.H.I.E.L.D. Helicarrier. Just a single thug was left standing after his attack, meaning that the super-heroes needed to just defeat one more to completely resolve the "Defeat Thugs" mission.

THE BLACK WIDOW HEAVILY INTERROGATES CROSSBONES

Having beaten as much out of Crossbones as she could, Natasha Romanova knocked the bodyguard out for the count and successfully concluded the "Clear Threats" mission. This meant that the Red Skull would now act after every two Hero cards rather than the normal three, so she subsequently whacked a thug at S.H.I.E.L.D. Headquarters too, and finished the "Defeat Thugs" mission too. Now the diabolical Nazi villain was vulnerable to direct attacks, and knowing full well what Shmidt planned next, the Black Widow travelled to Central Park to thwart him.

It was clear things were not going well for the leader of Hydra, so mustering all his evilness for one last 'roll of the dice', the Red Skull 'retreated' to S.H.I.E.L.D. Headquarters and managed to raise the Fear Track to an unhealthy twelve.

However, with a roar the Hulk was soon upon him, courtesy of another "Smash!" The impact not only hurt Shmidt directly. But also cleverly dispersed the four civilians the scarlet-faced bounder had been using as a shield. Before the despot could complain though, the Green Goliath socked him in the mouth.

THE HULK AND BLACK WIDOW FACE THE RED SKULL AT S.H.I.E.L.D. HEADQUARTERS
This just left room for the Black Widow to reach S.H.I.E.L.D. Headquarters and defeat the Red Skull with a shock from her Widow's Bite. New York City was safe, and Johann Shmidt had been beaten...

Wednesday, 18 October 2023

"Operation Sea Lion" 10mm Battle Report II: Britain Verses Germany

GERMAN TANKS ATTEMPT A LANDING ALONG THE SOUTH COAST OF ENGLAND

This game was played using some homemade rules (M.I.S.S.) so as to allow us to quickly play through a campaign utilising my painted 10mm World War Two Early War models by "Pendraken Miniatures", and took place upon a 48" x 48" "Deep Cut Studio" playmat. The battlefield was populated with a variety of pre-painted "Escenografia Epsilon" scenic pieces previously sold through the Middlesbrough-based company at Warfare 2021, but now sadly out of production.

“The story so far… It is September 1940 and having defeated France, the German Army have launched an amphibious assault upon Britain. Deployed from Le Havre, a small Axis strike force have already successfully taken the shores of Portsmouth, and now the Fuhrer has turned his attention to the nearby shingle beach of Gosport. Desperate to fend off the invasion, General Sir Alan Brooke has flooded the area of Stoke's Bay with Crusader II tanks - The Battle for Alverstoke has begun..."

THE TABLETOP - STOKE'S BAY IN SOUTHERN ENGLAND

The Germans started in the water, just before the southern shoreline. Consisting of a unit of four Panzers, a mixture of Panzer III and IV tanks, three Panzer IIs and four Panzerjägers, the Axis spearhead was poised to strike as far north as it could. In response, the British assembled three Crusader II tanks (west), a trio of Vickers VI tanks, two Matilda II tanks, and three (more) Crusader II tanks (east). All these armoured vehicles would rush south, destroying any enemy targets they encountered.

The tabletop was populated with a small number of bunkers to represent Browndown, and a collection of buildings and houses to portray Alverstoke and Anglesey. There were five strategic objectives evenly located across the battlefield. These were randomly valued from one to five points and would not be revealed until after the battle had ended. To win an objective an army must have at least one unopposed tank alongside it by the end of the eighth turn. In addition, no enemy tanks were allowed to come within an inch of an opponent's armoured vehicle - except to contest an objective. This was to ensure we played a 'shooting game' as opposed to just having all the tanks pile into one another.

SOME OF THE BUILDINGS DEPICTING BROWNDOWN, ALVERSTOKE AND ANGLESEY

The opening turns saw both forces attempt to outmanoeuvre one another and 'snatch' as many objectives as they could. The Panzers trundled their way to 'capture' Objective Four, whilst the Panzer II, III and IV tanks all moved towards the central objective in Alverstoke. The Panzerjägers rumbled past Objective Five, fixing their anti=tank guns upon anything which emerged from the direction of Anglesey.

Determined to keep the Axis Forces as close to the shoreline as possible, the British forces swept south, The Crusader II tanks (west) took Objective One, and began firing upon the oncoming Panzer III and Panzer IVs. The Vickers VI tanks sought the cover of Alverstoke's buildings, waiting for the much slower Matilda IIs to catch them up. Lastly, the Crusader II tanks (east) decided to bravely pass through Anglesey and rely upon their armour to outfight the Panzerjäger line.

AS THE PANZER II TANKS REACH THE SHORE, THE BRISTISH CRUSADERS POUNCE

Unfortunately, the German invaders decided now was the time to open fire with their guns. The whole Abteilung of Panzerjägers blazed away with their PaK 38(t) guns and left just a single Crusader II (east) standing south of Anglesey. The Panzer III and Panzer IV tanks took aim at the Crusader II tanks (west) which had previously fired upon them and blew one Cruiser up. It was disconcertingly first blood to the Third Reich.

Holding their nerve the sole-surviving Crusader II tank (east) returned fire upon the Panzerjägers, but without any result. Happily however, the same could not be said for the survivability of the Panzer II tanks approaching Alverstoke - two of which were blown up by the Matilda II tanks. Furthermore, the Crusader II tanks (west) managed to knock out the Panzer III, clearly blunting the Axis invasion's spearhead.

THE GERMAN PANZERS CAPTURE AN OBJECTIVE NEAR THE SHORELINE

Realising that their front line was in danger of irreparably breaking, the Panzers moved north past Objective Four to give the Crusader II tanks (west) something else to shoot at than the Panzer IVs. The lone Panzer II managed to secure Objective Two, and took shelter behind a building, effectively giving the Germans the centre of the battlefield. This 'advantage' was built upon by the Panzerjägers destroying the last of the Crusader II tanks (east) and the Panzer IVs blowing up another Crusader II tank (west).

It was clear that the British would need to reorganise to take account of their increasing losses, so the sole Crusader II tank (west) moved further west to take up a position overlooking the highly vulnerable Panzers. The Vickers VI tanks and Matilda IIs trundled south-east towards the Panzerjägers.

THE PANZERJAGERS OPEN UP AS THE BRITISH TANKS ADVANCE SOUTH

Confident they already held a strong line of offence, and relying upon their armour, the Panzer IVs sped north, whilst the Panzerjägers opened up upon the Matilda II tanks. This time though the King's armoured vehicles took the beating and continued onwards. Such an awesome display of 'Dunkirk spirit' clearly inspired the Crusader II (west) to annihilate one of the four Panzers south of Browndown. Whilst the Matilda IIs returned fire and destroyed a pair of Panzerjägers. Adding insult to injury, the Vickers VI light tanks' Besa machine guns somehow managed to score a couple of hits on one of the Panzer IVs.

With the battle heading towards it final phase the Germans decided to take what land they could and resultantly the Panzers retreated back south to hold Objective Four. Providing plenty of covering fire, the Panzer IV tanks blazed away at both the Crusader II tank (west) and the impudent Vickers VI armoured vehicles. But not a single shot penetrated the British. Indeed, the Matilda II tanks also remained untouched following another salvo from the usually deadly Panzerjägers.

BOTH ARMIES START TO TAKE A SERIOUSLY HARD POUNDING

Perhaps feeling the tide of the confrontation might be turning in the Allies favour, the Crusader II tank (west) trundled south using Browndown's fortifications as cover so it could keep the Panzers in sight. Meanwhile, another burst of Besa machine guns sensationally saw a Panzer IV go out of action, and the Matilda II tanks destroyed a third Panzerjäger. The Axis forces might have the positions, but their losses were now close to being unsustainable.

Seizing the initiative for the first time, the Crusader II tank (west) grabbed Objective One, and stoically watched as both the Vickers VI and Matilda II tanks swung about to challenge the Panzer II holding Objective Two. In direct response the Panzer IV headed north-west to contest Objective One, and the Panzer II tank unsuccessfully fired upon the approaching Vickers VI tanks. Finally, the Panzerjäger managed to strike one of the Matilda IIs. But such was the thickness of the Infantry Tank Mark II's 78mm front glacis, that no actual damage was caused.

THE BRITISH TANKS ATTEMPT TO DRIVE THE GERMAN INVASION FORCE INTO THE SEA

In a last burst of action, the Panzer IV contested Objective One and the single Panzerjäger withdrew to seize Objective Five. Astoundingly, the Panzer II tank managed to use its 2 cm cannon to destroy a Vickers VI tank. This meant that although the British armoured unit still contested Objective Two, the building between them and the Panzer II thwarted any line of sight to attack. In desperation therefore, the Matilda II tanks fired a last salvo at the Panzerjäger holding Objective Five and stunningly blew it up.

This meant that just a single objective was neither contested or void, and saw the somewhat mauled Panzers obtain a single Victory Point for holding Objective Four. The Battle for Alverstoke belonged to the Germans, and the Axis forces now had two footholds on the English mainland...

Friday, 11 August 2023

"Operation Sea Lion" 10mm Battle Report: Britain Verses Germany

GERMAN ANTI-TANK GUNS ATTEMPT A LANDING ON THE SOUTHERN ENGLISH  COAST

This game was played using some homemade rules (M.I.S.S.) so as to allow us to quickly play through a campaign utilising my painted 10mm World War Two Early War models by "Pendraken Miniatures", and took place upon a 48" x 48" "Deep Cut Studio" playmat. The battlefield was populated with a variety of pre-painted "Escenografia Epsilon" scenic pieces previously sold through the Middlesbrough-based company at Warfare 2021, but now sadly out of production.

“The story so far… It is September 1940 and having defeated France, the German Army have launched an amphibious assault upon Britain. Deployed from Le Havre, a small Axis strike force has reached the shore of Portsmouth, and begun disembarking its armoured vehicles. Stung into action, a hastily-assembled contingent of British tanks has been ordered by Prime Minister Winston Churchill to halt the invaders - The Battle for Southsea has begun..."

THE TABLETOP - SOUTHSEA IN SOUTHERN ENGLAND

The Germans started in the water, just before the southern shoreline. Consisting of a unit of three Panzerjägers, three Panzer II tanks, and a Command unit comprising of a single Panzer III with two escorting Panzers, the Axis spearhead was poised to strike as far north as it could. In response, the British had a trio of Vickers VI tanks just north of Clarence, two Crusader II tanks travelling towards Southsea, and two Matilda II tanks near Eastney. All these armoured vehicles would wind south, picking off any enemy targets as they travelled.

The tabletop was split in half with a line of unoccupied fortifications dominating the seaside resort's esplanade. To the north were the suburbs of Clarence, Southsea and Eastney. Whilst to the south was just the beach and shoreline. To win the German army had to cross the line of fortifications by the end of the game's eight turn. Furthermore, no enemy tanks were allowed to come within an inch of an opponent's armoured vehicle. This was to ensure we played a 'shooting game' as opposed to just having all the tanks pile into one another.

CRUSADER II TANKS ARE ORDERED INTO ACTION AS THE GERMANS APPROACH

With little to do at the beginning except move, due to the considerable distances between the two forces, the Germans essentially raced north as best they could. The Panzer II tanks however, decided to initially disregard the Vickers VI vehicles approaching them and swung slightly northeast in favour of adding their firepower to the centre of the battlefield where the Crusader II tanks were presumably heading. Realising that the heavily outdated Panzers were a little slower than the sole Panzer III, the medium tank was forced to maintain a speed consistent with its escorts.

Worried by the German anti-tank guns, the Matilda tanks decided to seek the shelter of Eastney, whilst the fast-moving Vickers VI vehicles hurried through Clarence. The Crusader II tanks took up a firing position just north of the gap between Clarence and Southsea, and awaited the Panzer III and Panzers.

BRITISH TANKS RACE SOUTH AS THE PANZER II TANKS HIT THE ENGLISH SHORELINE

Adapting their positions in response to the British movement, the Germans continued north. But had the Command unit shy away from direct contact with the Crusader II tanks. Meanwhile, the Vickers continued travelling south as fast as their Meadows 6-cylinder petrol engine would permit. Furthermore, both the Matilda II tanks and Crusaders opened up their guns with some ranging shots = all of which fell short of their targets.

Having finally seized the initiative, the Vickers VI tanks swung east by the southern end of Clarence to assault the Panzer II tanks, and teach them a lesson to ignore one of Vickers-Armstrongs' finest productions. Likewise, the Crusaders also pushed south towards the German Command unit, trusting in their armour and longer range weapons. The Matilda II tanks began infiltrating Eastney, using its buildings as cover from the German anti-tank guns.

THE GERMANS TRUNDLE UP THE BRITISH BEACH JUST AS THE VICKERS VI TANKS ARRIVE

Realising the potential threat the Vickers might pose, the Panzer II tanks turned to face their attackers, using one of the esplanade's forts to protect their exposed flank from the Crusaders. The Panzerjägers simply repositioned their "Forward Firing" guns to sweep the centre of the battlefield, and provide any supporting fire where possible. The Panzer III decided to strike out at the Crusaders. But missed.

Slightly confused at the non-appearance of the Matilda II tanks and no other prospective targets, the Panzerjägers decided to put the mission goal first, so pressed further north towards the line of fortifications. The Panzer II tanks opened up upon the Vickers VI vehicles in something akin to an old Wild West shoot-out. Shockingly though, it suddenly became clear that the German's auto-cannons were still out of range. Sadly for the British, this wasn't the case with the lone Panzer III, which blew up one of the approaching Crusader II tanks. First blood to the Third Reich.

THE BRITISH ATTEMPT TO ENCIRCLE THE PANZER II TANKS FROM TWO DIRECTIONS

Possibly reeling from the news that one of their fellow tanks had been destroyed, the Matilda II tanks continued to get themselves well and truly snarled up inside Eastney, essentially nullifying any threat the Infantry tank had. The Vickers VI vehicles closed the gap with the Panzer II tanks, and with a cheer, the surviving Crusader II tank lethally struck one of the Panzers escorting the Panzer III.

With both sides now tasting blood, the Germans continued to press their opponents with the Panzer II tanks finally finding their targets to be in range and demolishing two of the Matilda II tanks. Sensing that they were on the verge of a breakthrough, the Panzer III fired at the remaining (partially-hidden) Crusader II. It was a difficult shot, yet was successful. Incredibly though, the British vehicle's armour saved it from destruction.

THE MATILDA II TANKS FINALLY START TO ZERO IN ON THE GERMAN PANZERJAGERS

Having finally moved themselves in a position to spot the Panzerjägers, the Matilda II tanks watched as both the Crusader II and Vickers VI tanks failed to strike their targets. The wind of this particular small war was definitely flying in the favour of the Germans.

Realising that it was now time for an all or nothing assault, the British sat and opened fire upon their shoreline's invaders. The Vickers VI managed to pepper one of the Panzer II tanks with enough bullets to put the vehicle out of action. Whilst the Matilda II tanks quite surprisingly made their first impact upon the battle by destroying a Panzerjäger. However, the Crusader II was unable to hit the German Command unit.

THE PANZER II TANKS START MAKING LIGHT WORK OF THE MATILDA II TANKS

With time growing somewhat short, the two Panzerjägers reached the fortification line, ignoring any threat from the Matilda II tanks. The Panzer II tanks also wiped out the sole-surviving Vickers VI tank, leaving Clarence wide open for invasion. Despite there still being another turn to play, it was clear the Germans had caused enough damage to breach the British defences and won, so the game was ended early...

Friday, 4 August 2023

"Battle Of The Bulge" 10mm Battle Report III: Allies Verses Germany

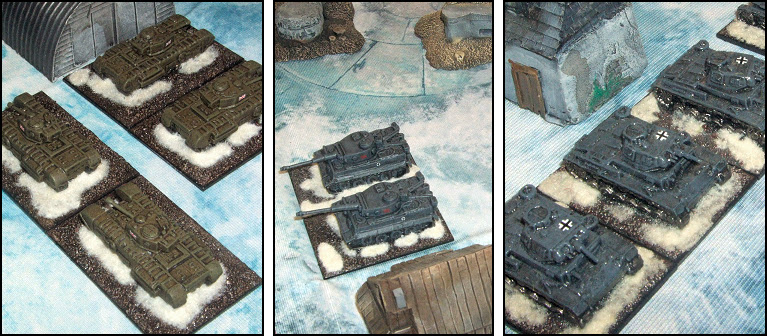
BRITISH CHURCHILLS TACKLE GERMAN TIGER AND PANZER III TANKS

This game was played using some homemade rules (M.I.S.S.) so as to allow us to quickly play through a short campaign utilising many of my painted 10mm World War Two (Winter) models by "Pendraken Miniatures", and took place upon a 36" x 28" "Deep Cut Studio" playmat. The battlefield was populated with a variety of pre-painted "Escenografia Epsilon" scenic pieces previously sold through the Middlesbrough-based company at Warfare 2021, but now sadly out of production.

“The story so far… It is December 1944 and the German Army have now committed some of their heavier armoured vehicles to the Ardennes Offensive. Having originally penetrated the western front line from Losheim in Eastern Belgium, the Third Reich's spearhead now plans to envelope the Allied Forces stationed within the municipality of St. Vith by suddenly sweeping south. However, the Allies have no less than two squadrons of American M4 Shermans, two squadrons of British Churchill VIIs, and a small number of M5A Stuarts stationed there..."

BRITISH CHURCHILLS TACKLE GERMAN TIGER AND PANZER III TANKS

The Germans started in the Fort District, with a division of Panzer III tanks and another of Panzer IV (75mm Short) tanks located along the region's southernmost area looking to quickly rush into the Rural and Fishing Districts. The Army's Tiger tanks were placed in the southeastern corner with orders to dominate the centre of the battlefield. Whilst a division of Panzer IV (75mm Long) tanks were positioned on the eastern flank so as to head straight into the Town District. A small unit of Panthers was held in reserve to support either the Tigers or Panzer IV (Long) tanks.

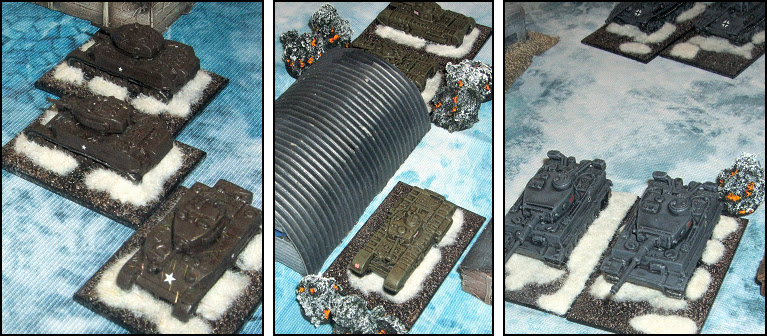
Across from the German's position, in the Village District, the First British squadron of Churchill VIIs were instructed to compete for the middle of the warzone, and Second British squadron, along with the American M5A Stuart tanks, tasked with taking the Fishing District. Both American squadrons of Shermans, codenamed "Babs" and "Vagabond", were ordered to travel north to 'capture' the Farm and Town Districts.

The tabletop was split into six identically-sized Districts, each populated with a number of buildings to represent their occupants. Each area was worth a single victory point, with a seventh point being offered to any unit which held the very centre of the battlefield. To win an area an army must be the only side with any armoured vehicles in it by the end of the game's sixth turn. Furthermore, no enemy tanks were allowed to come within an inch of an opponent's armoured vehicle. This was to ensure we played a 'shooting game' as opposed to just having all the tanks pile into one another.

THE BATTLE BEGINS WITH THE CHURCHILL TANKS TAKING A HARD POUNDING

The battle opened with the Allies reacting to the presence of the Germans. Both the Second Churchill and Stuart squadrons moved west into the Fishing District. However, alarmed at the presence of the Tiger tanks, all of the Shermans headed northeast trying to ensure there were some buildings between them and their opponents. The First Churchill squadron remained stationary, and, having passed an intimidation check to fire at the Tiger tanks, managed to cause some minor damage to one of their "overengineered" opponents. First blood to the British.

In response, the Panzer III tanks headed south into the Rural District and the Panzer IV (Long) tanks moved southeast to swoop upon the Shermans. The Panthers also trundled south to support the Tiger tanks, which unsurprisingly returned fire upon the First Churchill Squadron hitting one armoured vehicle twice. Furthermore, the Panzer IV (Short) opened up upon the Second Churchill Squadron and struck one of its tanks a couple of times too.

Seizing the initiative, the Germans settled down to blast away at any and all opposition. Utilising their long-range guns, the Panthers struck the leading vehicle of the Second Churchill squadron. The Panzer IV (Short) tanks targeted the smoking hull and blew the British infantry tank up despite its heavy armour. Encouraged by their colleagues' success, the Panzer III tanks fired at the remaining Churchill tank hunkered down beside a Fishing factory, and caused two hits. Perhaps the Allies' reliance upon the armoured vehicles' 152 mm armour to keep them safe was unwise..?

THE CHURCHILL TANKS ENDURE AN ABSOLUTE DRUBBING AS THE 'HANDS' OF THE GERMAN TANKS

The Tiger tanks subsequently poured more fire into the First Churchill squadron and two more fiery plumes erupted from their target. The British were definitely taking a hard-pounding in the early stages of this fight. To make matters worse, "Vagabond" squadron also lost one of its Shermans to a blaze of fire from the Panzer IV (Long) tanks.

Despite this loss though, the American Shermans continued heading north towards the Town District. Whilst the Stuarts swung into the Fishing District unchallenged. Showing plenty of Tommy steel, both British Churchill squadrons decided to stand their ground and returned fire upon their numerous attackers. A single Panzer III tank was 'cooked' by the assault. But the Tiger tanks were undamaged.

With the battle already very much in the balance, the Allies realised they needed to hold firm and poured as many shots into the oncoming Germans as they could muster. The Shermans' managed to get two crippling hits upon one of the Panzer IV (Long) tanks challenging them, and the First Churchill squadron managed a similar feat upon one of the Tiger tanks. However, the Second Churchill squadron missed the Panzer III tanks entirely. Perhaps discretion might have been the better part of valour..?

THE ALLIES FINALLY START TO PUT PRESSURE ON THE ADVANCING GERMAN LINE

The Panthers continued to travel south in support of the Tiger tanks, who shockingly failed to hit any of their large British targets. The Panzer IV (Long) tanks did though manage to destroy another of the Shermans, and the first of the American Stuarts was pulverised by a salvo from the Panzer IV (Short) tanks. Quite possibly summing up the incredible good fortune of the Third Reich, one of the Panzer III tanks even managed to damage the sole-surviving member of the Second Churchill squadron.

Sensing that the moment to win this winter-based confrontation was now, the German Panthers rolled past the Tiger tanks with fresh orders to seize the centre of the battlefield. The Panzer IV (Short) tanks opened up upon the Stuarts, destroying another. However, luckily for the Allies, the American squadron's final armoured vehicle was just out of range of their guns. Such news did not cheer the "Grand Alliance" up for long though, as the Tiger tanks finally ripped apart one of the First Churchill squadron's members. Whilst the Panzer III tanks sensationally put an end to the entirety of the Second British Churchill Squadron. Plus, the Panzer IV (Long) tanks took out another of the Shermans.

ISOLATED AND ALONE. THE ALLIED TANKS TAKE SHELTER WHERE THEY CAN

It was now clear that the combined British and American forces were never going to destroy enough of their opponent's vehicles in time to win any more districts, so the decision was made for the Allied tanks to hold what they already owned. Resultantly, the sole Stuart surrounded itself with Fishing warehouses, and the Churchill started to retreat back to the shelter of the Village District. The Shermans though needed to clear the Farm District of the Axis, so fired for all their worth at the Panzer IV (Long) tanks, and shockingly blew a pair of them up. Surely the Allies couldn't snatch an unlikely victory from the jaws of defeat..?

Racing north towards the Town District, "Vagabond" was ordered to ignore the remaining Panzer IV (Long) tank and 'go for the victory points'. "Babs" was instructed to provide the American Sherman squadron with covering fire, and incredibly blew away the final German tank in the Farm District - suddenly edging the Allies ahead. In a show of defiance, the Churchill blazed away at the approaching Panthers. But failed to make a connection.

Reeling from their grip of the battle astonishingly loosening, despite their superior firepower and numbers. The Germans attempted to seize as much territory as they could by moving the Panzer III tanks back to hold the Fort District. The Panzer IV (Short) were ordered south and the Panthers south-east. The Tiger tanks also repositioned themselves instead of firing, by wheeling about so they could strike east before the fight ended.

THE GERMAN HEAVY ARMOUR MOVE INTO POSITION TO SEIZE VARIOUS DISTRICTS

"Vagabond" continued to travel north to take the Town District. Whilst "Babs" hunkered down to hold the Farm District. Content that they already had possession of the Village District, the Churchill once again fired at the Panthers, and once again missed their target.

The Panzer III tanks took the Fort District for the Axis forces, and the Panzer IV (Short) tanks captured the Rural District. Despite the fire from the First British Churchill squadron, the Panthers easily trundled into position at the centre of the battlefield. Finally, the Tiger tanks entered the Town District, contesting the area with the Shermans of "Vagabond" squadron. The battle was drawn, albeit the Allies had been pushed to their very limits...

Tuesday, 9 May 2023

"Battle Of The Bulge" 10mm Battle Report II: Allies Verses Germany

AMERICAN AND BRITISH TANKS DEFEND AGAINST SOME GERMAN PANZER IIIs AND IVs

This game was played using some homemade rules (M.I.S.S.) so as to allow us to quickly play through a short campaign utilising many of my painted 10mm World War Two (Winter) models by "Pendraken Miniatures", and took place upon an old 24" x 24" game board. The battlefield was populated with a variety of pre-painted "Escenografia Epsilon" scenic pieces previously sold through the Middlesbrough-based company at Warfare 2021, but now sadly out of production.

“The story so far… It is December 1944 and the German Army have already started their Ardennes Offensive by striking out at the Allied Forces from Losheim in Eastern Belgium. As part of this attack a force of Panzer III and Panzer IV tanks is pushing west through the town to help reinforce the Third Reich's initial spearhead. However, the Allies still have two squadrons of American M4 Shermans and some British Churchill VIIs in position to oppose the thrust..."

THE TABLETOP - PART OF LOSHEIM IN EASTERN BELGIUM

The Germans started on the eastern edge of the battlefield. In the north east Festung Division contained three Panzer IV tanks with (Short) 75mm guns, in the centre Volks Division was comprised of three Panzer IV with (Long) 75mm guns, and in the south east Schwert Division contained a trio of Panzer III tanks. Across from their position, along the western edge, were the American First and Second Squadrons consisting of three M4 Shermans with 75mm guns apiece, and a squadron of British Churchill VIIs in the centre.

The tabletop was populated with a number of houses to represent the town in the north and the less developed buildings on its southern outskirts. There were three strategic objectives located in a line from the south west corner to the north east corner. These were randomly valued from one to three points and would not be revealed until after the battle had ended. To win an objective an army must have more tanks than their opponent within six inches of it. In addition, no enemy tanks were allowed to come within an inch of an opponent's armoured vehicle. This was to ensure we played a 'shooting game' as opposed to just having all the tanks pile into one another.

THE GERMAN PANZERS LAUNCH THEIR ATTACK

Considering that the German plan was simply to roll straight at their opponents and blow then away, it came as no surprise that all their armoured vehicles moved west in some fashion or another. Schwert Division scuttled in between the village buildings, whilst Volks Division decided to rely upon the armour of its Panzer IVs. Festung Division also headed west, deciding that if they took too much damage that they could fall back to properly secure Objective One.

In response, only the Sherman named Babs moved, rumbling northeast so they could have a better line of sight against their opponents. The rest of the Allied line simply fired and wildly cheered as their salvos took an encouragingly good toll upon the advancing Germans. One of the Panzer IIIs was hit, followed by a Panzer IV (Short) being struck twice. But then in the centre, the Churchill VIIs also managed to hole one of the Panzer IVs (Long) too - partially engulfing the entire Axis line in smoke.

THE GERMAN TANKS ARE PEPPERED BY THE ALLIES' GUNS

Heartened by this success, the American Shermans fired again completely destroying a Panzer III , a Panzer IV (Short) and damaging another Panzer IV (Short). The British did just as well, wrecking a Panzer IV (Long) and striking a second Panzer IV (Long) alongside it. The Allied firepower had been devastating, and wrecked the German Army's plan to use its slight numerical advantage to win the day.

Splitting its force's orders between movement and returning fire, the Third Reich took the central Objective Two and sent the remnants of Festung Division back east to hold Objective One as well. Schwert Division attempted to obtain as much cover as they could  amidst the village in the south, whilst the Panzer IVs (Long) opened up on the Churchill VIIs causing a single hit. On paper the Germans were still 'out in front'. But in order to do so, they had lost a third of their number, and if the Allies were to seize the initiative it seemed unlikely the Axis forces would hold the ground gained for long.

THE BRITISH CHURCHILL VIIs DISH OUT SOME SERIOUS PUNISHMENT

With their opponents whittled down by two rounds of intense firing, the American First Squadron headed east towards Objective One with only Vagabond staying behind to support the two Churchill VIIs in the Allied centre line. These British tanks continued to pound away at the Panzer IVs by Objective Two and damaged another one. Second Squadron also headed east with Babs providing some unsuccessful covering fire against the Panzer IIIs before them.

Having currently seized control of two of the three objectives, the German forces finally started to fire upon the Allies with some gusto. Babs and a Churchill VII were struck as a result. Furthermore a Panzer IV (Short) moved into a position to flank attack the American First Squadron in the north.

DESPITE TAKING FIRE THE AMERICAN SHERMANS PUSH FORWARDS

In response Ol' Reliable positioned itself by a Windmill in the village so as to have better sight of Objective Two and Vagabond attached itself to the Churchill VIIs - just in time to witness the British tanks blow up a second Panzer IV (Long). In the north, Kraut Killer roared east towards Objective One. Whilst down south Second Squadron destroyed another Panzer III. Things were definitely turning in the Allies' favour, especially when the only thing the Germans could muster in reply was a dent in Babs' hull.

It genuinely was now or never for the Third Reich, so the entire Axis line - or at least what remained - opened up with everything they had. Babs was sensationally blown up, marking the first Allied tank casualty of the day. A Churchill VII, Kraut Kruncher and Kraut Killer were also damaged. But it was not enough to stop Bouncing TNT from reaching Objective One.

BABS SUCCUMBS TO ITS DAMAGE AS THE FIGHTING GETS CLOSE AND PERSONAL

The signal was suddenly given for the majority of the Allied armour to push eastwards, so with a gruff rumble of engines the Churchill VIIs moved towards the centre of the battlefield with Vagabond just behind them. Ol' Reliable also moved so as to face the final Panzer III head on.

Now the American and British had started their counter-attack there really was no stopping them. The two Churchill VIIs and Vagabond swamped the Germans holding Objective Two, just as Kraut Killer ensured First Squadron contested the Third Reich's control of Objective One. Ol' Reliable even won a moral victory over the Panzer III it faced by damaging the Axis tank without suffering anything itself.
THE BRITISH AND AMERICAN TANKS PUSH ON FOR VICTORY
The final round of German fire was completely ineffective, resulting in the Allies successfully winning Objective Three (for three Victory Points), muscling in to win Objective Two (for one Victory Point), and earning a well-fought draw over Objective One. The Americans and British had quite easily held off the German assault in the end. But more Axis armour was en route...