This is another battle report to 'showcase' my homemade ruleset Unternehemen Seelowe. I've increased the number of special units involved to provide an opportunity for me to explain their rules as the narrative progresses. For example, more German Undead in the shape of Werewolves, Command Units (Officers) and British Armoured Suits. As a result it may be worth re-reading my earlier post as I've tried (in the main) not to cover the rules explained in "The Selsey Landing". The miniatures are all from "West Wind Productions" "Secrets Of The Third Reich" range.
This second in a series of battle reports covering the German Reich’s (fictitious) invasion of the United Kingdom in September 1940, sees an Axis force attempt to establish a base of operations on the outskirts of Bognor Regis; a seaside resort town on the English South East coast. Each force can only consist of infantry units, and cost 100 points.
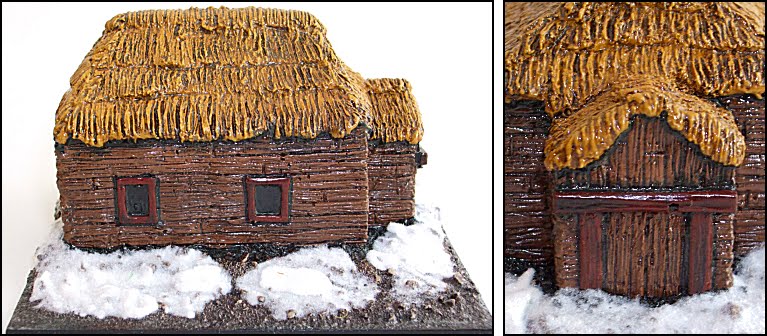
Once the table was laid out, five objective markers were placed for the forces to fight over. These were positioned at strategic areas of interest on the battlefield and consisted of: (1) a field surrounded by bushes in the Southwest; (2) an area of settled coastline in the Southeast; (3) the centre of the battlefield; (4) a T-Junction on Bognor’s coastal road to the Northwest and (5) the residential outskirts of Bognor town to the Northeast. The encounter would last for six turns.
The British, having already started work on some barbed wire barricades following the failed Axis landing at Selsey, deployed the British Parachute Regiment (consisting of one unit of Red Berets armed with Carbine rifles, and a second armed with Bren light machineguns) to the west of the town. The majority of the defending force however remained within the outskirts of the town, including the British Commandos, a Heavy Weapons Team and a Heavy Machinegun Team.
The Germans fielded a strong Undead centre, placing their Sniper Team between two units of Zombies and a Werewolf. Alongside these unholy horrors, and in front of the German Mech Grenadier Command Unit, a unit of Mech Grenadiers were deployed knee-deep in the sea as it snaked its way northwards, culminating into an inland pool (near Objective Two).
 At the start of the first turn, the British won the initiative and so could move/fire/fight (hand-to-hand) with all their units before the German’s turn began. The main body of the defending force pushed forwards south of Bognor’s residential buildings. In particular the British Parachute Regiment advanced down the west flank of the battlefield towards the field [Objective One] in order to ensure the German’s couldn’t outflank the British from that direction at least without a fight.
Tucked away besides a building in the most eastern part of the residential outskirts, the British Sniper Team opened fire on the ‘overly exposed’ German Infantry wading up towards the settled coastline [Objective Two]. The (two) Snipers have the special ability Long Range; so can shoot at anything up to 30 inches away as opposed to the normal shooting range of 20 inches. The marksmen also have the special ability Sharpshooter, which means that instead of ordinarily hitting an exposed (vulnerable) target on the roll of a 4, 5 or 6 (using a D6), they would hit a target on the roll of a 3, 4, 5 or 6. Amazingly though, having presumably missed their Bully Beef breakfast, the Snipers rolled a 1 and 2, and failed to hit the Axis ‘sitting ducks’. The Bazooka Team (positioned just east of the Red Berets) also have the special ability Long Range, so opened fire on one of the units of German Zombies. One of the animated corpses fell to the earth. Like the majority of combatants, the Living Dead have the special ability Armour. Ordinarily this means that in order for their armour to save them and so they can remain on the battlefield, a ‘casualty’ needs to roll a 6 on a D6. However the Bazooka Team also have the special ability Armour Piercing, which put simply, cancels out any opponents Armour ability. First (coagulated) blood to the British.
At the beginning of the Axis turn, the ‘weakened’ Zombie Pack activated its Regeneration special ability. This allows a player, at the start of their turn, to roll a D6 for each missing model within the unit. Upon the roll of a 6, that model is ‘returned’ to the unit. However on this occasion no corpse returned to its feet. Enlivened by the British Sniper fire pinging around them, the German Mech Grenadiers hauled themselves out of the water to claim the settled coastline [Objective Two] for the Fatherland. The ‘unscathed’ unit of Zombies and a Jager Werewolf soon joined them. To the Southwest the second Zombie Pack and more Germany Infantry (armed with automatic rifles) clambered over a hedgerow to enter the field [Objective One].
 Far Southeast the German Panzerschreck Team utilised its Long Range and Armour Piercing and blew up a single Tommy emerging from the residential outskirts of Bognor. The German Sniper Team also fired, aiming their sights on the ‘steam-powered’ British Armoured Suit who was just starting to cross the Bognor dirt road (running east to west just south of the residential outskirts). One bullet struck the British steel clad warrior. Because the marksmen were close to the German Mech Grenadier Command unit, the Sniper Team was able to call upon its officer’s Command [German] special ability and (re)fire its missed shot. A unit with Command allows any friendly unit (as defined within the Command parenthesis) that is within 12 inches of it to re-roll a single dice roll once per turn. Unfortunately the retaken shot also missed. Even more disappointingly for the Axis Forces, the British Armoured Suit has the Heavy Armour special ability. This means that in order for their (heavy) armour to save them a ‘casualty’ needs to roll a 5 or 6 on a D6; and the encumbered British soldier did just that. Finally the German Heavy Weapons Team blazed away at the oncoming British Parachute Regiment, felling two of the carbine-carrying Tommies.
Having won the initiative, the Germans ensured they had a ‘tight’ hold of the settled coastline [Objective Two] with their Mech Grenadiers by pushing the accompanying unit of Zombies and the Werewolf further North, towards the British line. To the Southwest the second Zombie Pack and unit of Germany Infantry took position of the field [Objective One].
The German Panzerschreck Team continued to fire anti-tank rockets at the British Infantry emerging from the buildings of Bognor, and killed another two brave soldiers. The German Sniper Team also kept the British Armoured Suit in their sights, but those shots that struck the steel plating were frustrated by the thickness of the armour. To the west, another Red Beret fell before the assault rifles of the German Heavy Weapons team.
 Facing a withering hail of Axis firepower, the British gritted their teeth, remained in position and simply unleashed upon the Germans all that Queen and Country could muster. In the centre of the line, the Heavy Machine Gun Team poured bullets into the Zombie Pack approaching them from the coastline, returning three of the putrid cadavers back beyond the grave. To the West, inspired by their own British Command unit, the British Commandos slew two of the Zombies stumbling towards them from the field [Objective Two]. A blaze of fire from their Bren light machine guns saw the British Heavy Weapons Team finish this particular horde of the Undead off. The British guns then turned their attention to the German Infantry in the field, and the Armoured Suit dispatched one Jerry with his handheld Vickers machine gun. Two more of the Mech Grenadiers fell to a bazooka blast, leaving a solitary German stood alone in the middle of (but still holding) the field [Objective Two]. To the far West, a German Jagerhund Alsatian had steadily been moving forward amidst the cover of some farm buildings. Having finally emerged the Undead beast faced the British Parachute Regiment, and with a howl of pain and anger took two wounds as a result.
The British won the initiative for the third turn of the battle and bravely took the centre of the battlefield [Objective Three] with a unit of Commandos. Then, with the exception of their Command unit moving south in support of the British Infantry, the Tommy firing line remained stationary, gripped their weapons and prepared to give the Hun ‘more of the same’.
Inspired by their earlier success at dispatching the Undead, the British Heavy Weapons Team turned their light machine guns upon the remaining German Zombie Pack, and gave a hearty cheer when the last of the walking corpses fell still. The Heavy Machine Team therefore turned their sights upon the German Infantry holding the coastline [Objective One] and thanks to their Command unit being within appropriate proximity struck the Mech Grenadiers five times. No amount of body armour was going to save the Fatherland’s ‘favoured’, and the entire German unit was wiped out to a man. The sole surviving German Infantryman in the field fared equally as poorly, being gunned down by the British Armoured Suit. With no closer targets available to them, the British Bazooka Team turned their attention to the German Sniper Team and fired its high explosive round (four dice) at them. Because the Axis marksmen have the Camouflage special ability, an enemy unit always suffers –1 to its dice roll when firing at them, so the British unit needed to roll a 6 to hit them. Therefore despite the ferocity of their barrage only one of the Nazi crack shots was killed. Finally, somewhat understandably unnerved by the slavering man-dog tearing towards them, the two units of Red Berets only managed to inflict a single further wound upon the Undead German Jagerhund Alsatian.
 Devastated by two turns of withering British fire the Axis Forces moved quickly to try and penetrate the British line, and gain a foothold on the English Southeast coast. The Jagerhund moved itself into range so as to charge the Red Berets in the next turn. The Jager Werewolf moved itself into a similar position, facing the British Commandos in the centre of the battlefield [Objective Three] over a barbed wire barricade. Both the German Panzerschreck Team and the Sniper Team tried to provide the red-furred beast support by firing at the Commandos, but only one Tommy was slain. To the West the German Heavy Weapons Team finally put an end to the unit of Red Berets armed with Carbine rifles.
With howls of bloodlust, the Axis Forces won the initiative for the fourth turn of the battle, and immediately charged their were-creatures into their respective foes. In addition the German Heavy Weapons Team placed their assault rifles over their shoulders and started to clamber over the hedgerow that formed the perimeter of the field. The Germans would need to take and hold this plot of earth if they were to have any hope of ‘winning the day’ and establishing their Axis beachhead.
 Unfortunately the impact of the German firing was less than was hoped for as only the Panzerschreck Team scored a hit, and that saw just one of the three-man British Heavy machine Gun Team fall.
However, the British Forces were left reeling from the hand-to-hand onslaught of the German were-creatures. The Jagerhund Alsatian, who easily tore through their body armour, slaughtered the entire British Parachute Regiment to their last Red Beret. Equally as devastating was the assault by the German Werewolf upon the British Commandos, who were quickly cut down to a man by tooth and claw. In a matter of seconds the entire British line was about to be broken by Lycanthropy.
Blazing away with his Vickers machine gun into the Jagerhund Alsatian, the British Armoured Suit gave the were-creature a taste of British steel and dispatched the beast, saving the British line from faltering. In the centre the Heavy Machine Gun Team also poured lead into the Jager Werewolf, and amazingly, with three wounds inflicted upon it, it too fell dead to the ground. Inspired by their colleagues shooting, the British Bazooka Team once again turned their attention to the German Sniper Team and killed the remaining marksman with a high explosive round.
Despite having taken a heavy toll upon the Axis Forces, and being numerically superior, the British Army were still without an objective, and so having won the initiative for the penultimate round, set about moving all of its surviving units South in order to ‘take the battlefield’.
Demoralised and battered, the German Forces still clung to the slight hope of holding off the British Tommy and achieving a draw, if they could recapture the field [Objective One], the Coastline [Objective Two], and contest for the centre of the field of battle [Objective Three]. As a result, those meagre Germans alive forded water and hurdled hedgerows in their advance Northwards.
Both the British and the Germans rolled the same for the Initiative roll for the sixth and final turn. The Fatherland therefore went first because if the roll is a draw, then the player who went second in the previous turn gets to go first. The German Panzerschreck Team therefore crossed the water and, despite being horribly ‘out in the open’, reached the Coastline [Objective Two]. The German Mech Grenadier Command also rushed forwards, clambering up and over a hill in their desire to reach the centre of the battlefield [Objective Three]. Desperate to ward off any British unit daring to enter and contest the field [Objective One], the Mech grenadiers armed with assault rifles riddled the oncoming British Armoured Suit with bullets, but could only cause two of the four wounds needed.
Spurred on by the ‘invulnerability’ of his British steel suit, the ‘mechanized’ Tommy crashed through the hedgerow and into the field [Objective One], ensuring the Germans didn’t solely hold the ground. The British Command unit rushed and claimed the centre of the battlefield [Objective Three]. The British Heavy Weapons Team remained just outside the residential outskirts [Objective Five], whilst the Bazooka Team ensured it ‘stayed put’ on the Bognor Road T-Junction [Objective Four].
 Determined to make the Axis Forces pay for daring to mount a second raid upon the English Southeast coast, the British Sniper Team ‘picked off’ both members of the Panzerschreck Team, vacating the area of settled coastline [Objective 2] of any soldiers whatsoever. The Heavy Machine Gun Team also opened fire, this time upon the fast approaching Mech grenadier Command unit. Three of the German officers crumpled to the ground dead, with the fourth ‘offiziere’ only saved from an inglorious death by his body armour. However the ‘leutnant’ was only given a momentary respite, as the British Heavy Weapons Team quickly gunned him down. In an effort to completely eradicate the invaders the British Bazooka Team fired upon the German Heavy Weapons Team. However only one Mech Grenadier fell before the onslaught of the high explosive rounds.
With the battle over, it was now a simple matter to determine who had ‘won the day’ by counting who held the most objectives on the battlefield. Inspired by some Armour saves earlier on, the British Armoured Suit had marched southwest far enough (within six inches) to challenge the German Mech Grenadiers armed with assault rifles for the field [Objective One]. As a result neither side could claim the ploughed soil as exclusively theirs; nor could either force claim the unoccupied coastline [Objective Two]. However the British had taken and held the centre of the battlefield [Objective Three], the T-Junction on Bognor’s coastal road to the Northwest [Objective Four] and the residential outskirts of Bognor town to the Northeast [Objective Five], giving Churchill’s men a strong and decisive victory over the invading German Forces.

 These “West Wind Productions” models are from the ‘Secrets of the Third Reich’ ‘blister’ US-SOTR-1 “US Amoured Infantry”, but also form part of the SOTR-SP03 US Armoured Infantry Starter Box Set.
 Back in January 2010 I got hold of a couple of US-SOTR14 ‘US Battle Suit 50 Cal HMG–Comanche’ models second-hand (as part of a pair of SOTR-SP03 ‘US Armoured Infantry’ starter sets). At the time I complained about how dissatisfied I was with the models' joints and that even after some significant drilling and pinning, and some liberal applications of (various) superglues, I still found that the arms continued to droop or the torso fell apart. In the end, I resorted to some generous ‘dollops’ of "Milliput" to ensure a ‘fit’. I was never happy with the final result as I felt that the putty around the arms was so obvious, especially after I managed to fit the second model together without anywhere near as much "Milliput".