|
| "I'll make it very simple for you, Farmer. We got here first..." |
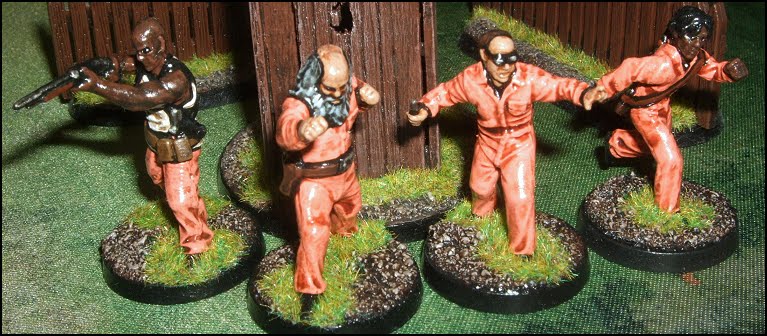
This 28mm scale model of Dexter is produced by “Mantic Games” and can be found inside "The Walking Dead: Call To Arms" Prisoner Booster Pack. Sculpted to represent the "towering, physically intimidating inmate who survived the outbreak" trapped in the cafeteria of the Meriwether County Correctional Facility, the convicted murderer was fatally shot in the head by Rick Grimes whilst fighting off a mass of zombies released from A-block in Issue 19 of "The Walking Dead" comic book.
Having been supplied already assembled to a base, the figure was primed using two coats of "Vallejo" Heavy Orange, and had his prison overalls washed with "Citadel" Reikland Fleshshade. I did consider dry-brushing the man's trousers with some (more) "Vallejo" Heavy Orange, as I ordinarily do, but as with all this range's models, I didn't feel the soft detail would respond as well as I would like to my brushstokes, so I ultimately left all the garments alone.
 |
| The Voord quickly gain the upper hand over the much-slower Yeti and seize some early objectives |
Dexter's heavily pouched belt was painted in "Vallejo" Heavy Brown, his vest in Dead White, and his skin in Heavy Sienna. All of these areas were then shaded using “The Army Painter” Strong Tone Quickshade. Lastly, I 'picked out' the inmate's infuriatingly 'soft' chest holster in "Citadel" Abaddon Black, finished off both his pistol and shotgun with a combination of "Citadel" Ironbreaker and (OOP) Badab Black.
Shifting across from pigmenting prisoners to wargaming, I have played another battle in my ongoing “Doctor Who” campaign exclusively using just my collection of “Black Tree Design” miniatures and some home-made rules. This conflict saw the Great Intelligence launch an attack upon the Voord on a frozen planet and resulted in some serious close combat scraps. Fought across a 2’ x 3’ rock-infested landscape, with a pair of freezing lakes partially separating the two factions, the game initially saw the flipper-footed Voord using their quicker speed and "Water-Walk" ability to seize the initiative.
 |
| The robot Yeti batter the Voord into submission with their incredible strength and armoured fur bodies |
Yet it soon became clear that the robot Yetis' armoured fur covering, and single Web-gun, was going to make them incredibly hard to shift once they got themselves into a significant victory-point winning position. Admittedly, the Voord were both lead by the commanding presence of Yartek, which permitted any friendly unit within 12 inches to re-roll a single dice roll once per turn, and armed with knives. But it took a lot of effort to take down just one of the Great Intelligence's shaggy minions, whereas the Yeti soon started chopping down the Voord with great clubbing swings of their claws.
Increasingly low on the numbers needed to fell their opponents, Yartek's faction soon lost control of the space between the two frozen lakes at the centre of the battlefield, and before long were pushed further and further back from their goals. In the end, the sheer physicality of the Yeti saw the Great Intelligence achieving twelve victory points to the Voord's one point, providing the mysterious disembodied entity with a foothold upon Yartek's fast-dwindling empire...